
- Create An Interactive Image
- Add interactive-img.com To The HTML Field Security List
- Embed The Hotspot Image Into The Sharepoint Page
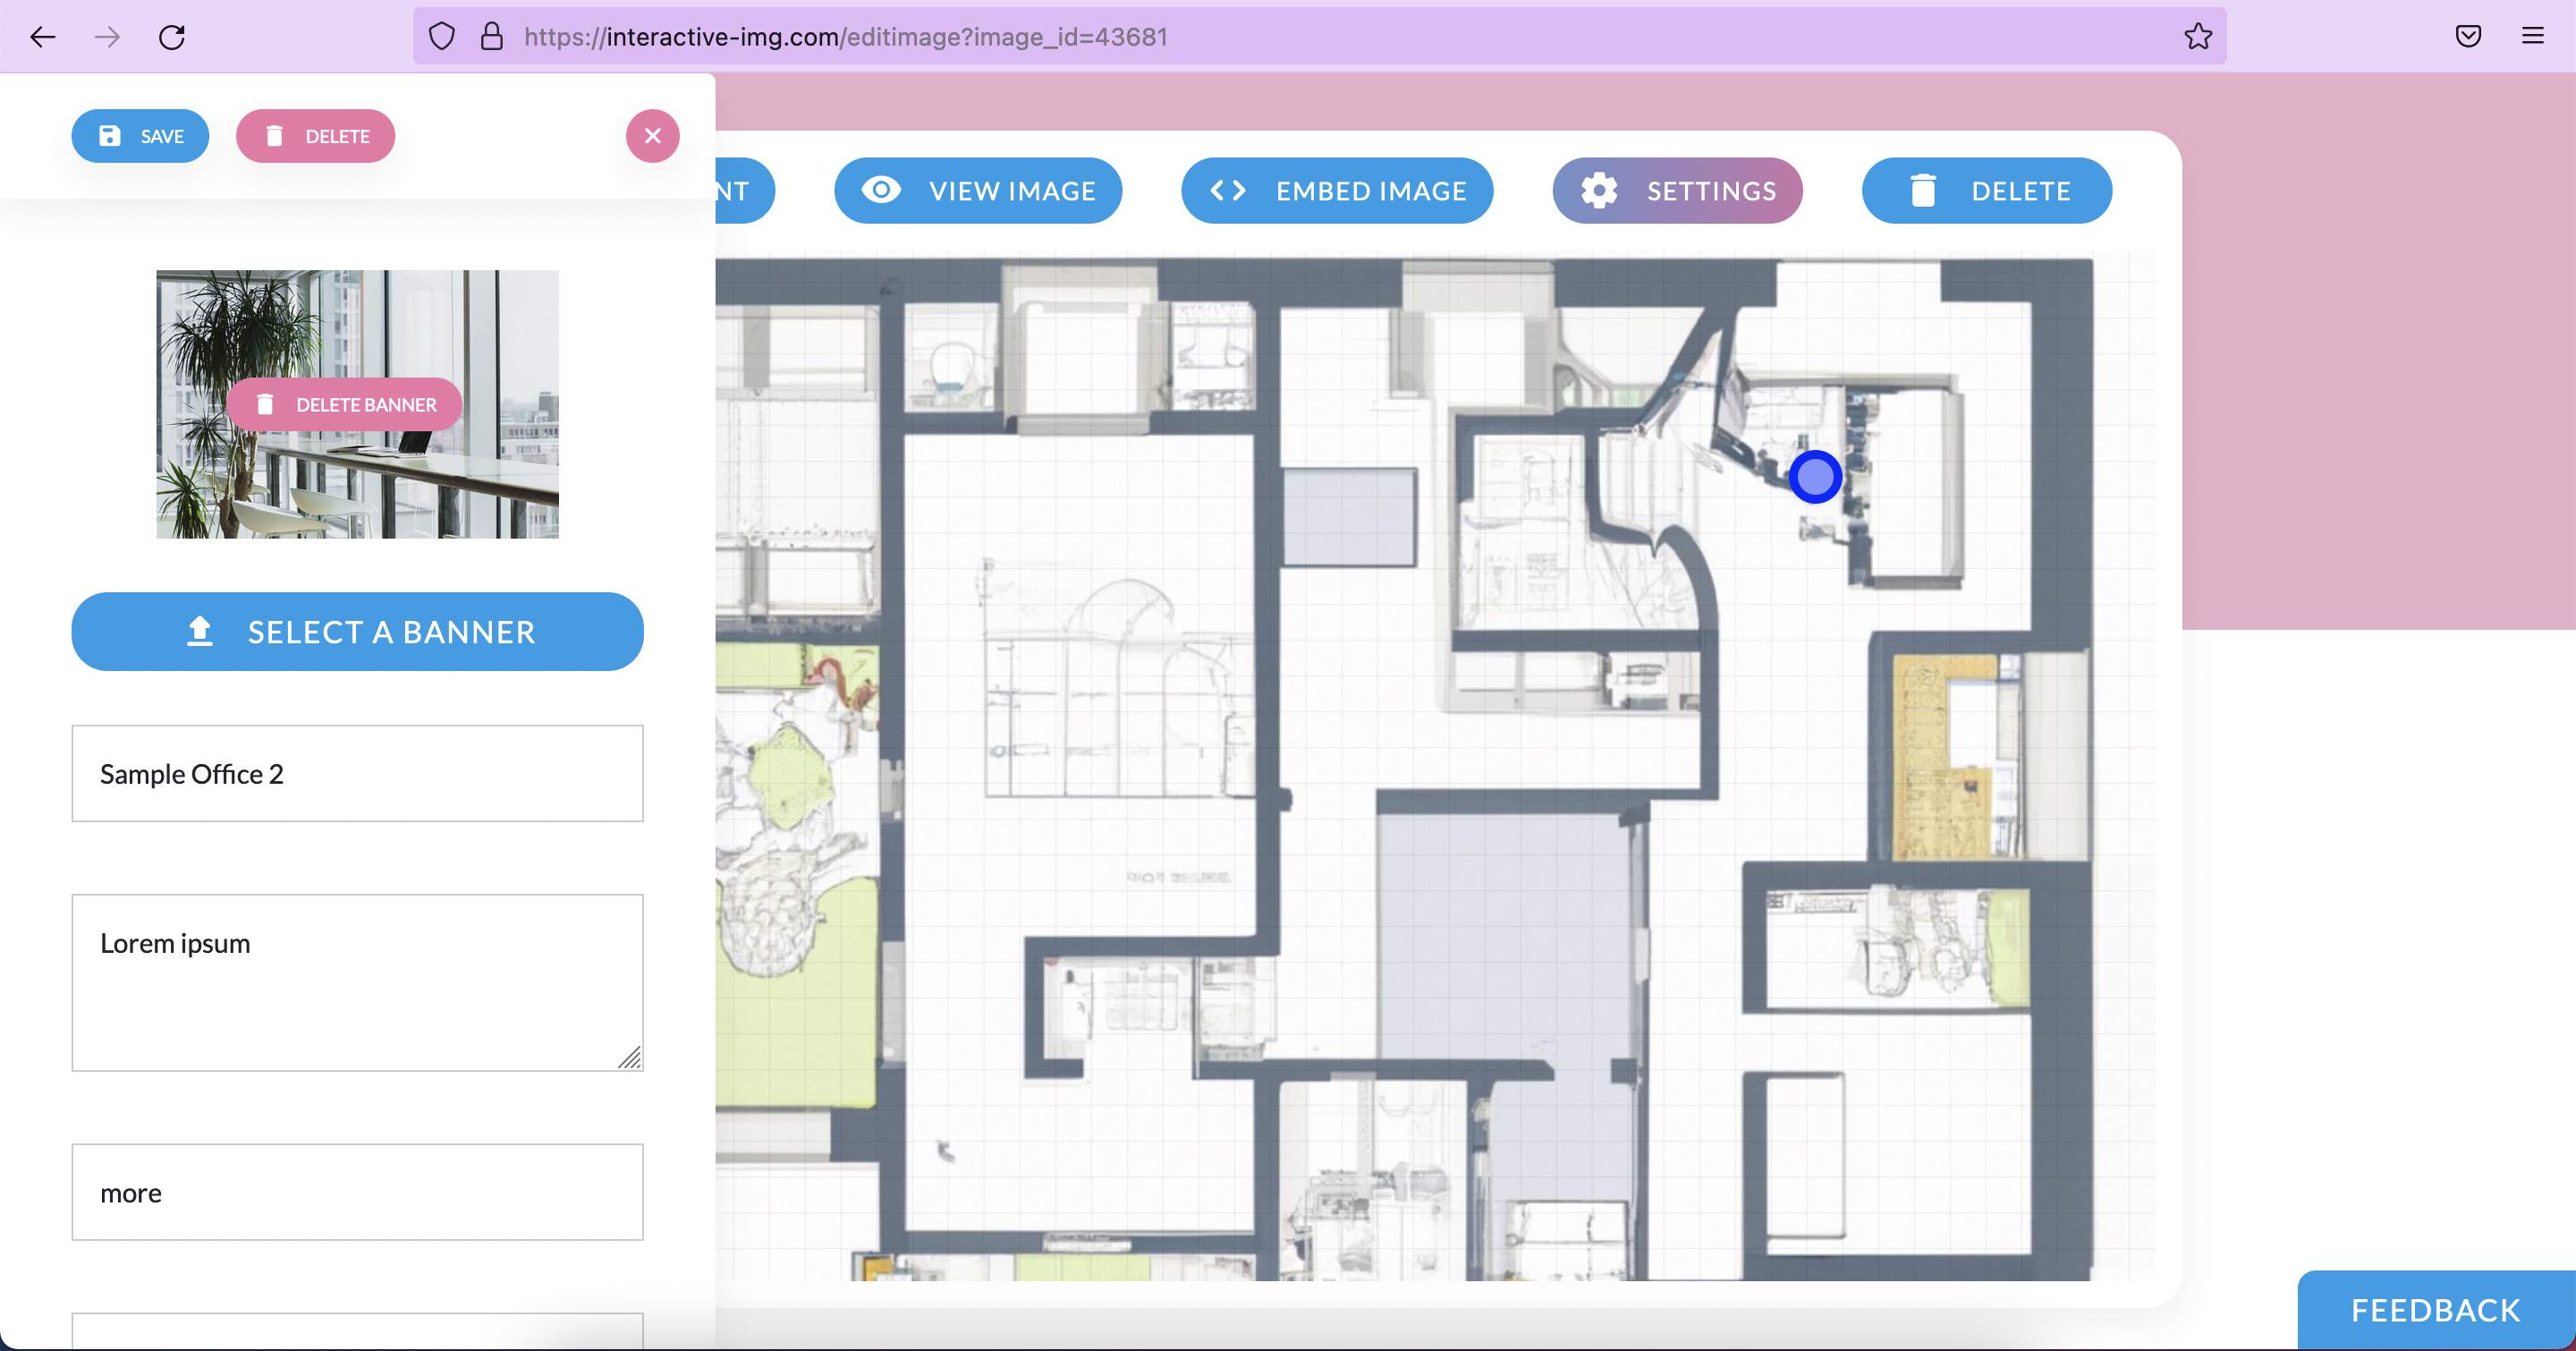
Create An Interactive Image
First create an interactive image. If you are not already familiar with interactive-img.com. The following post describes how to create your first image.
Add interactive-img.com To The HTML Field Security List
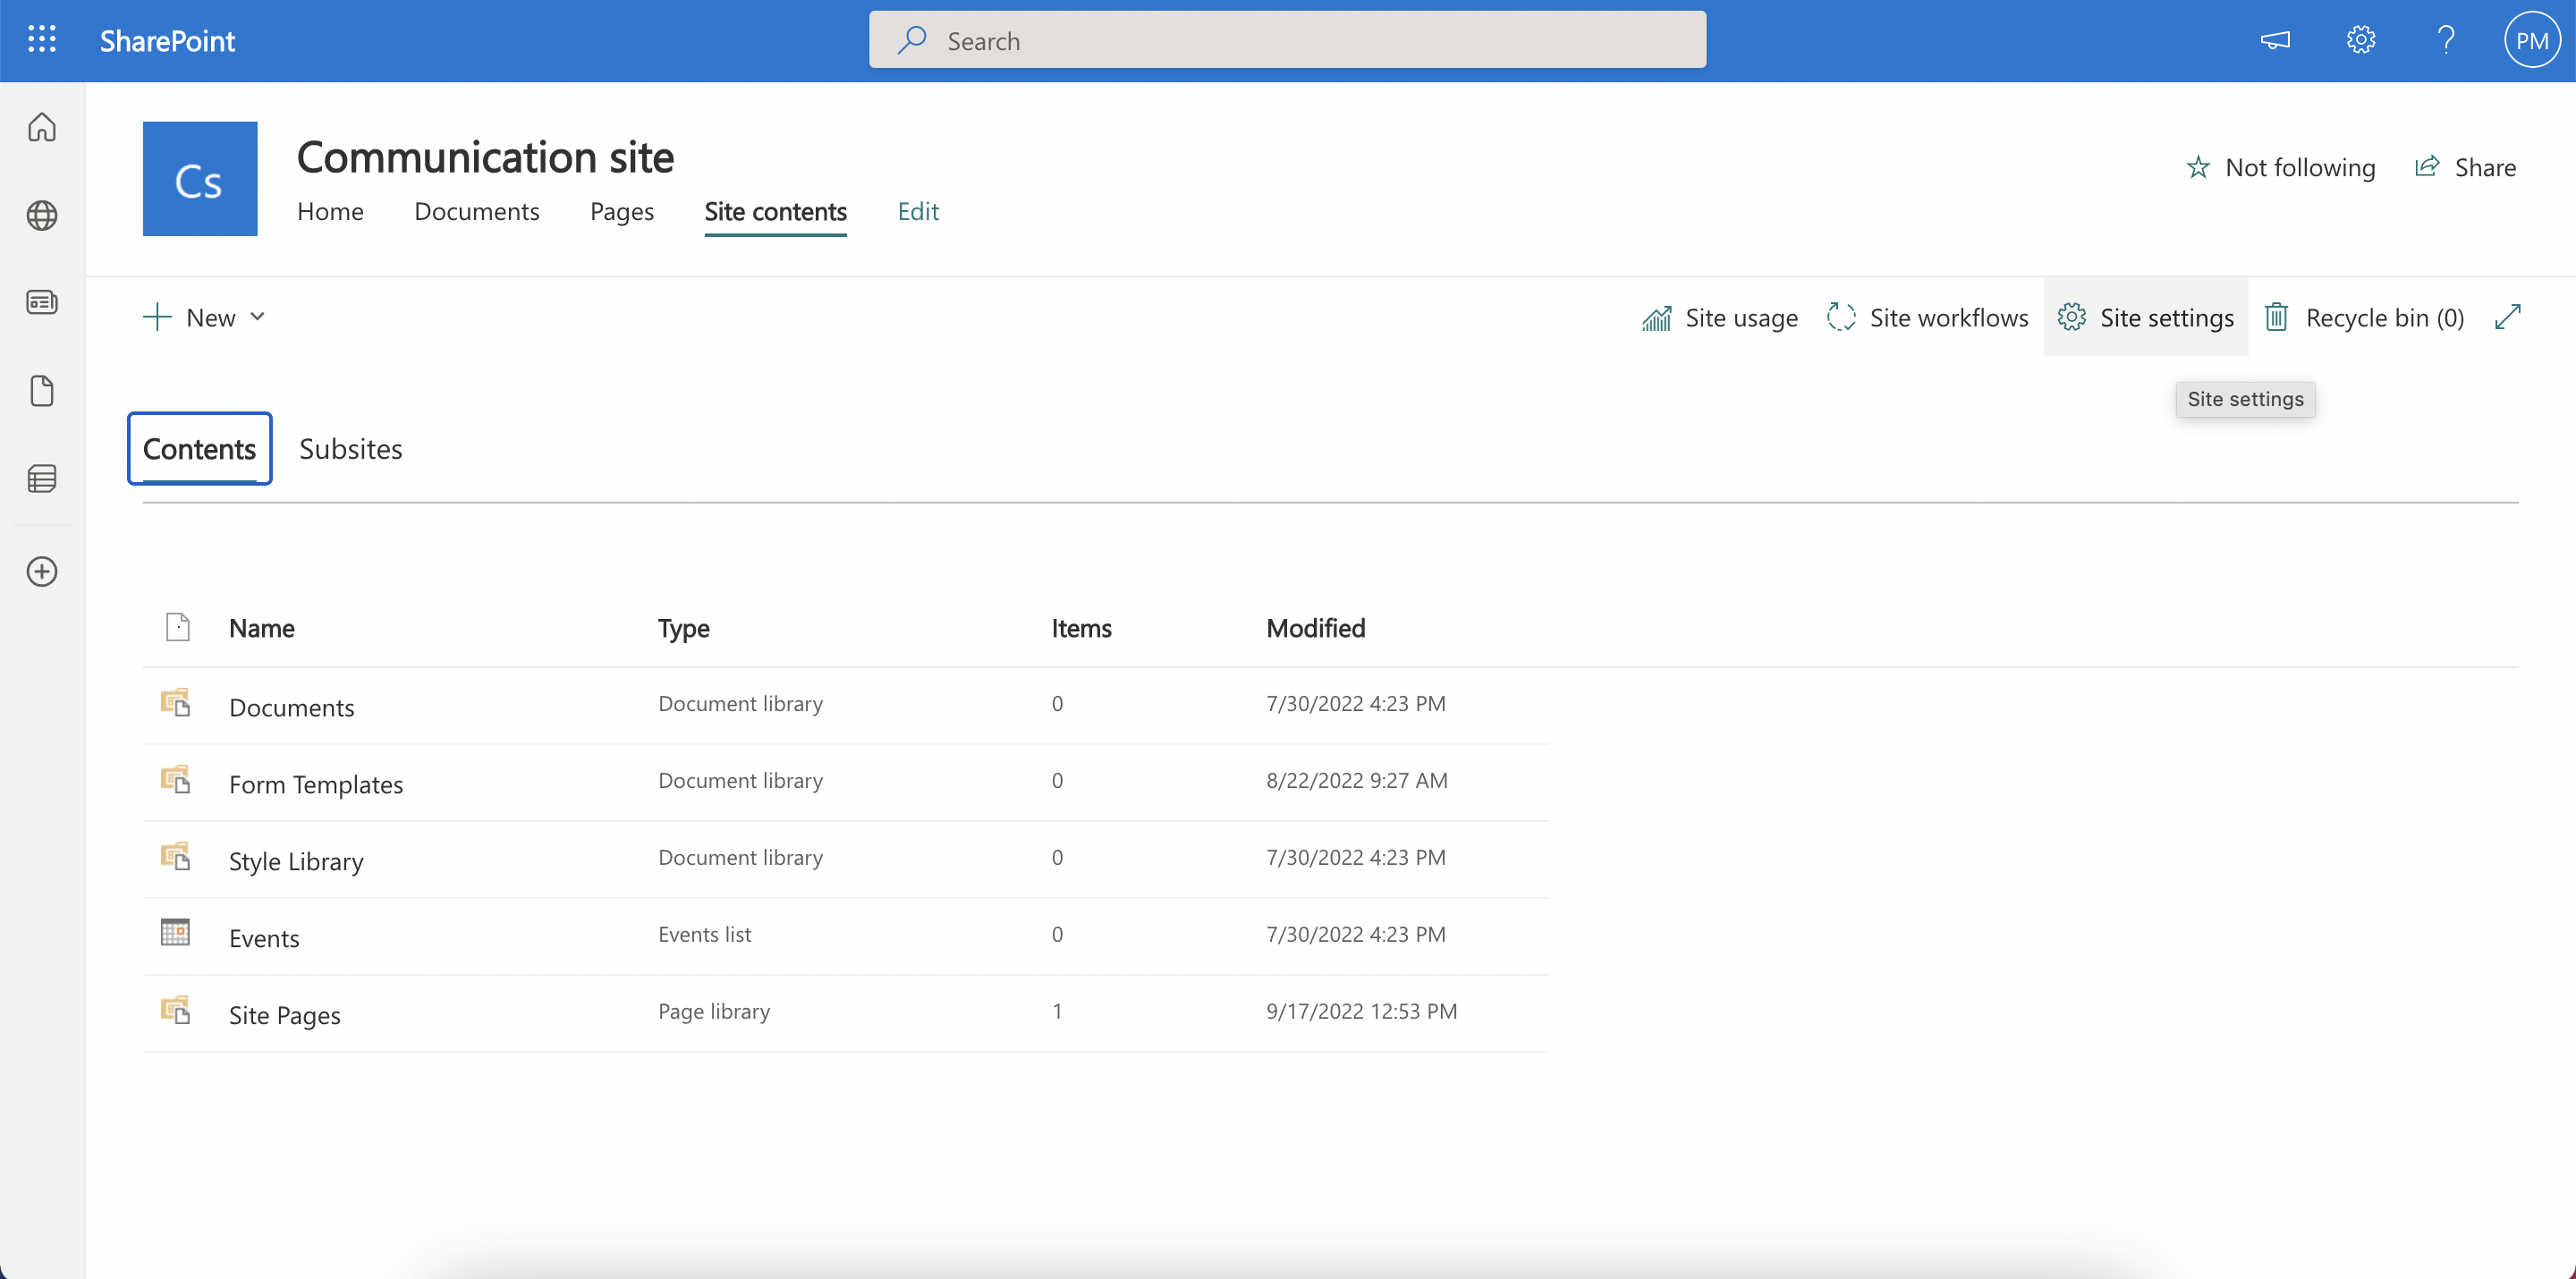
First the interactive-img.com url has to be added to the "HTML Field Security List" in order for the image to be used within a sharepoint page. To do that click on the settings button and navigate to "Site contents".

After you have been redirected to "Site contents" click the "Site settings" button.
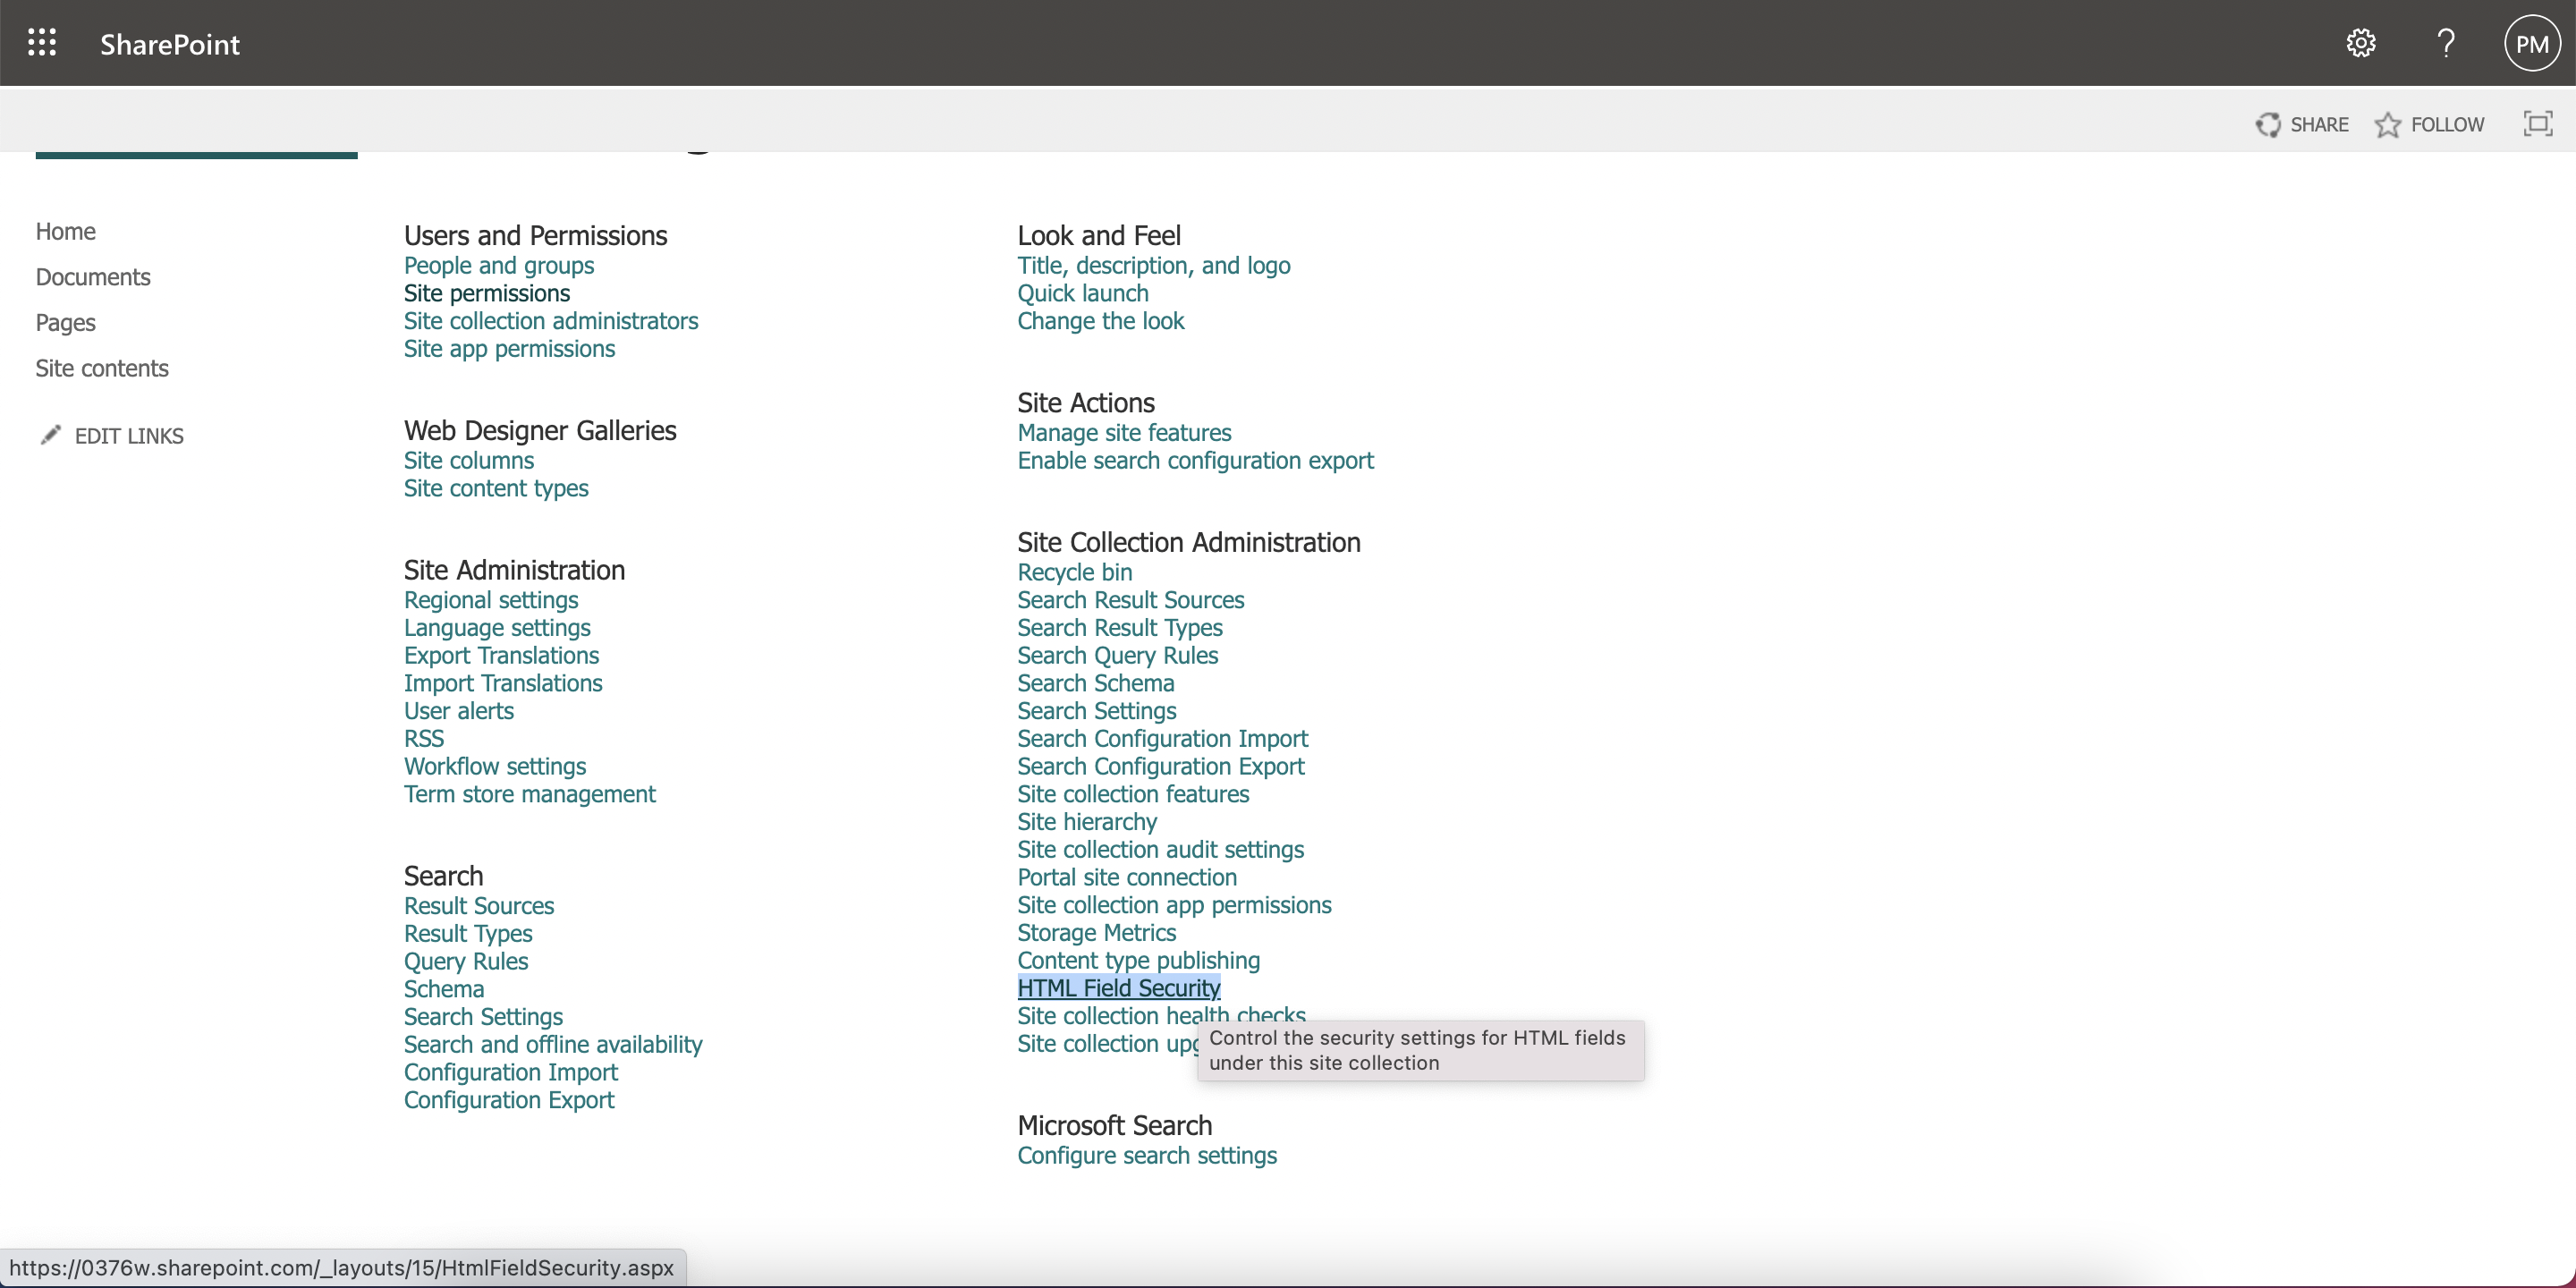
On the next view click on the "html field security" link.
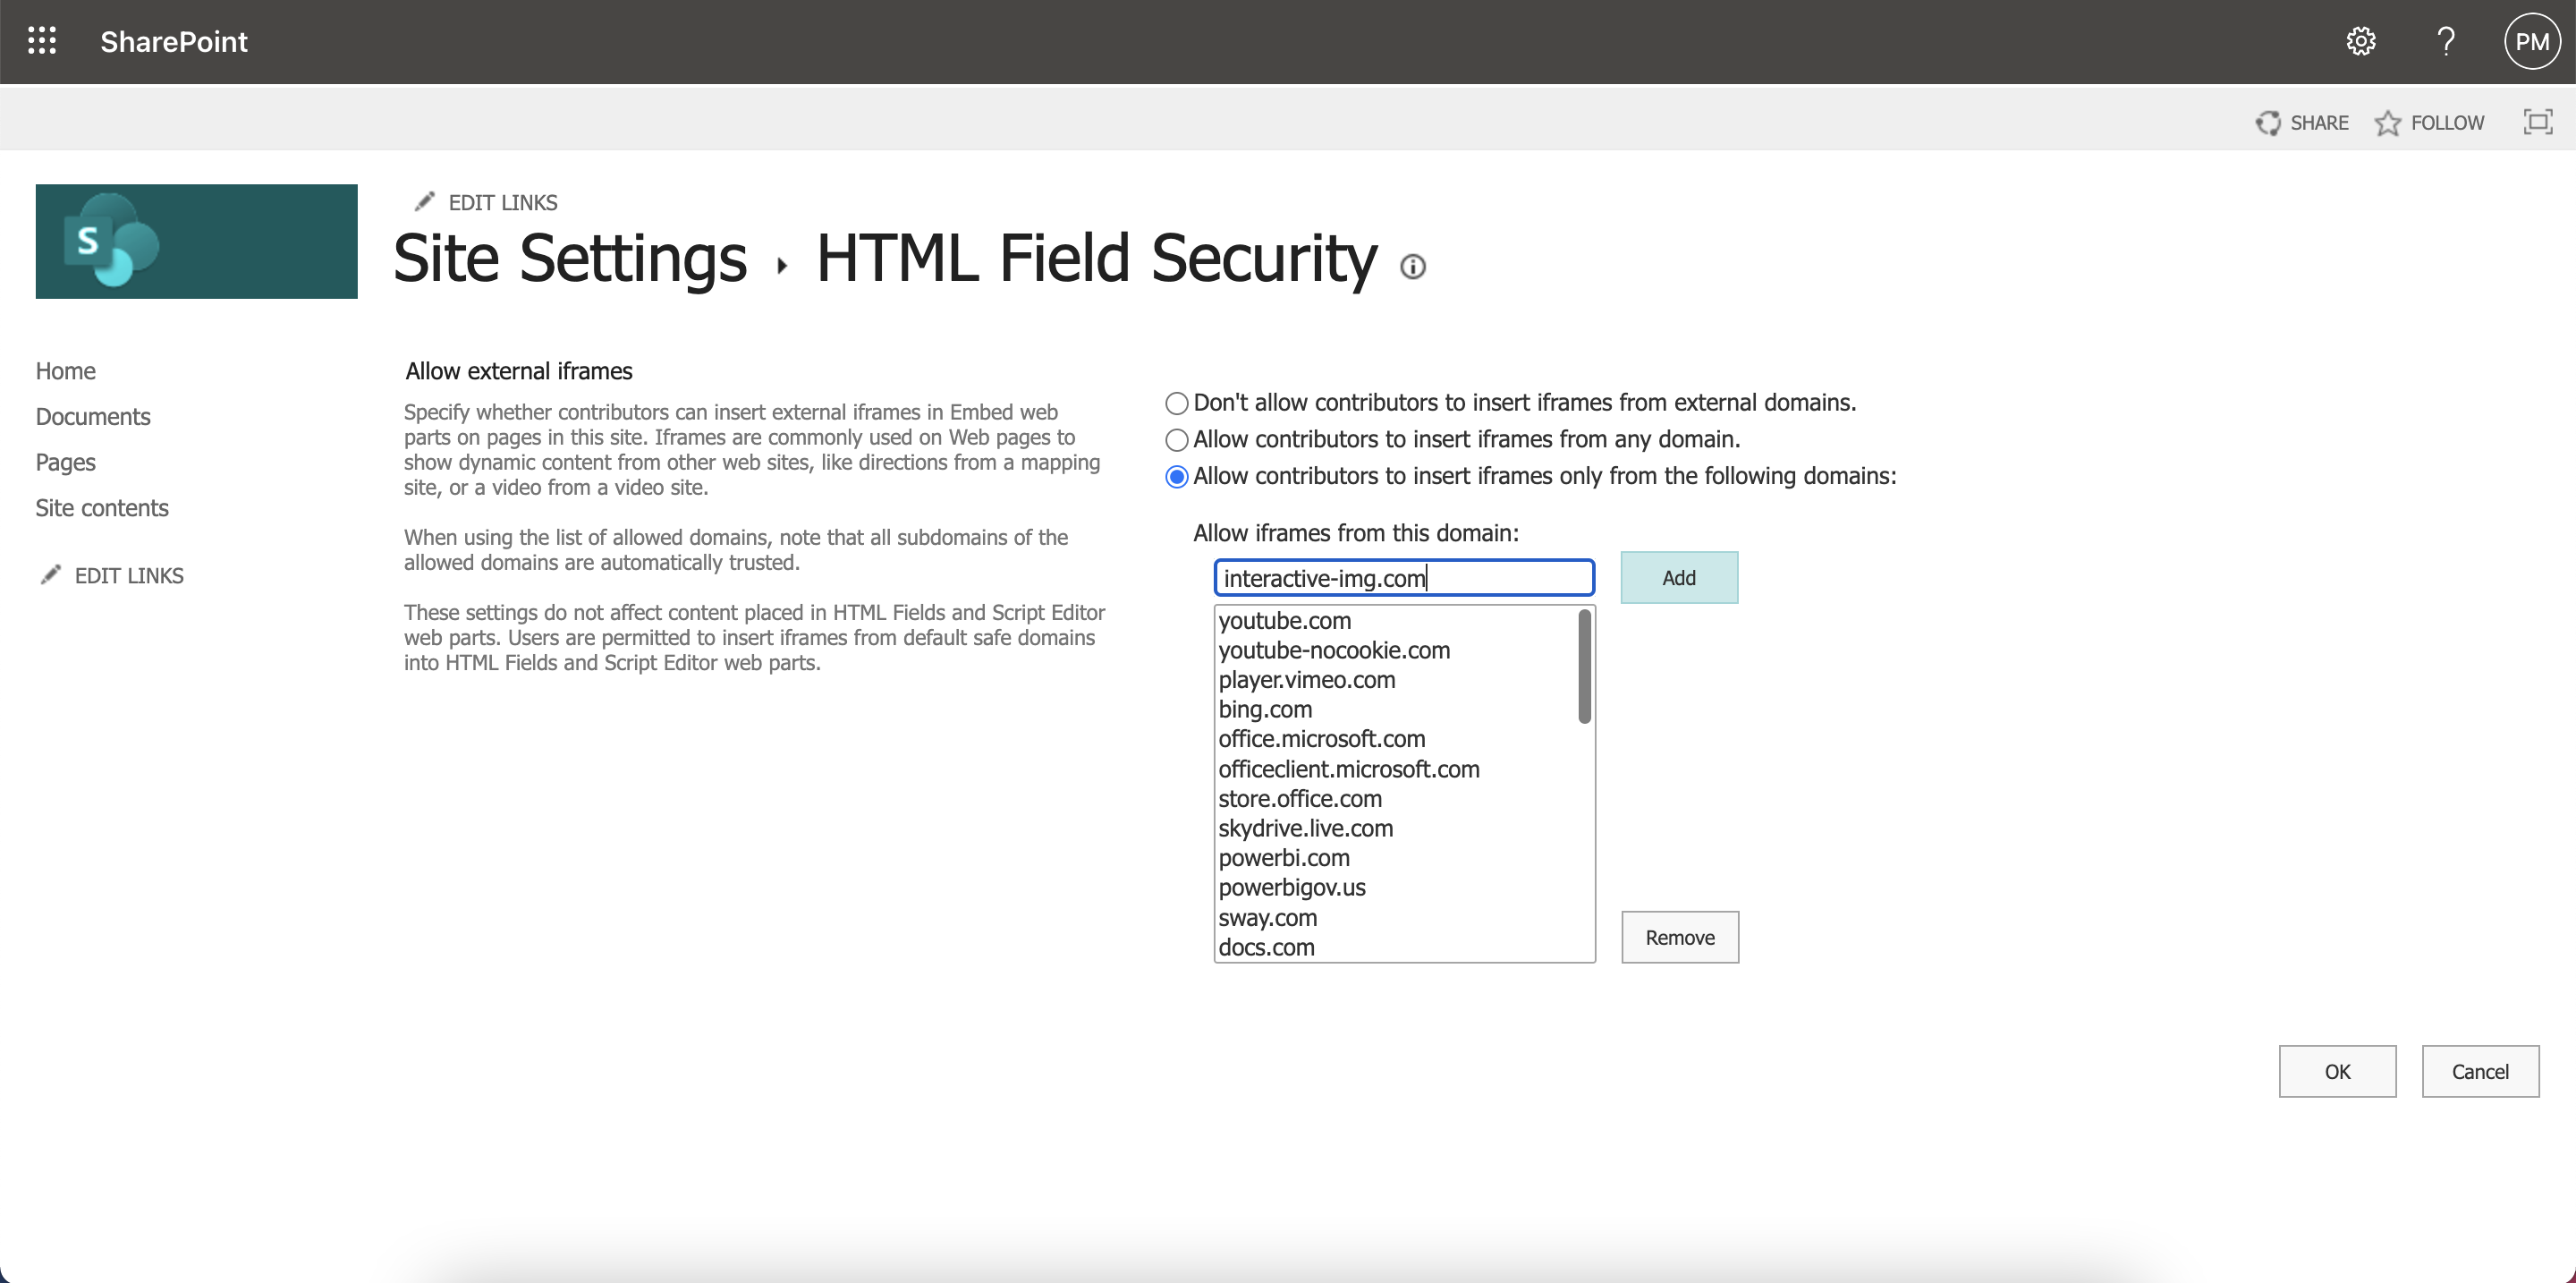
Add "interactive-img.com" to the allowed domains list.
Embed The Hotspot Image Into The Sharepoint Page
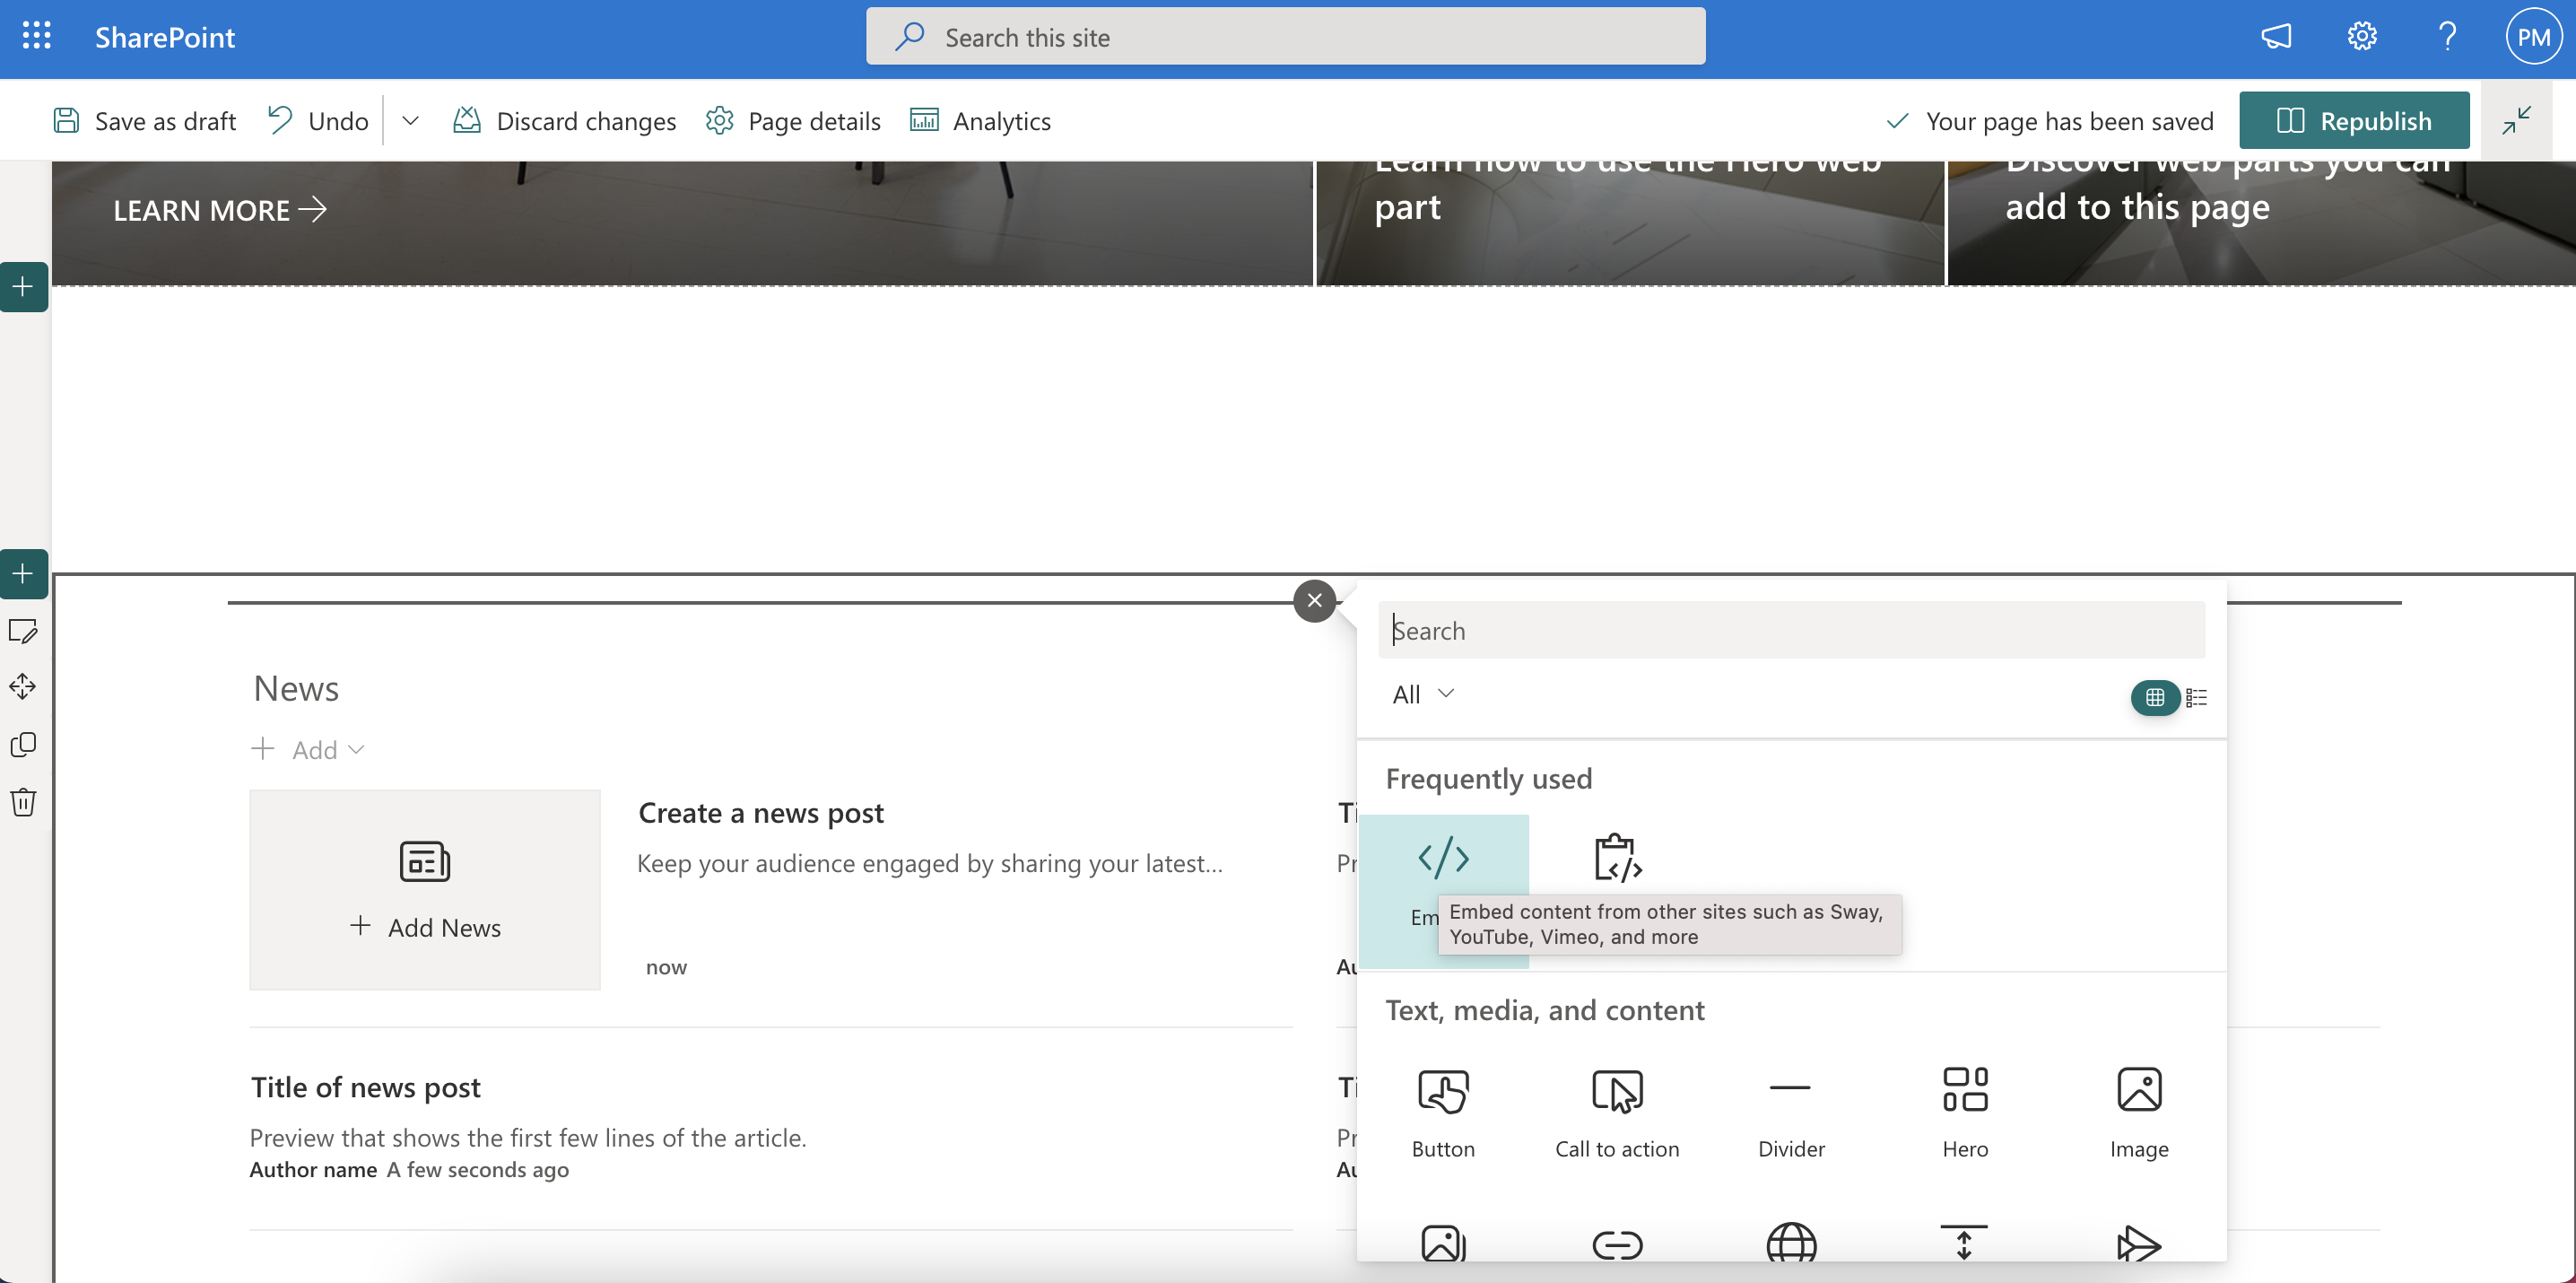
After adding the domain head over to the sharepoint page where you want the hotspot image to appear. Add a new section and add "embed" content.
Go to interactive-img.com dashboard choose the image you want to embed and click the embed button. An overlay will appear where you can choose from an js integration and iframe. Choose the iframe version and copy the embed code.

Navigate back to the sharepoint page and paste the copied code into the the embed input field.
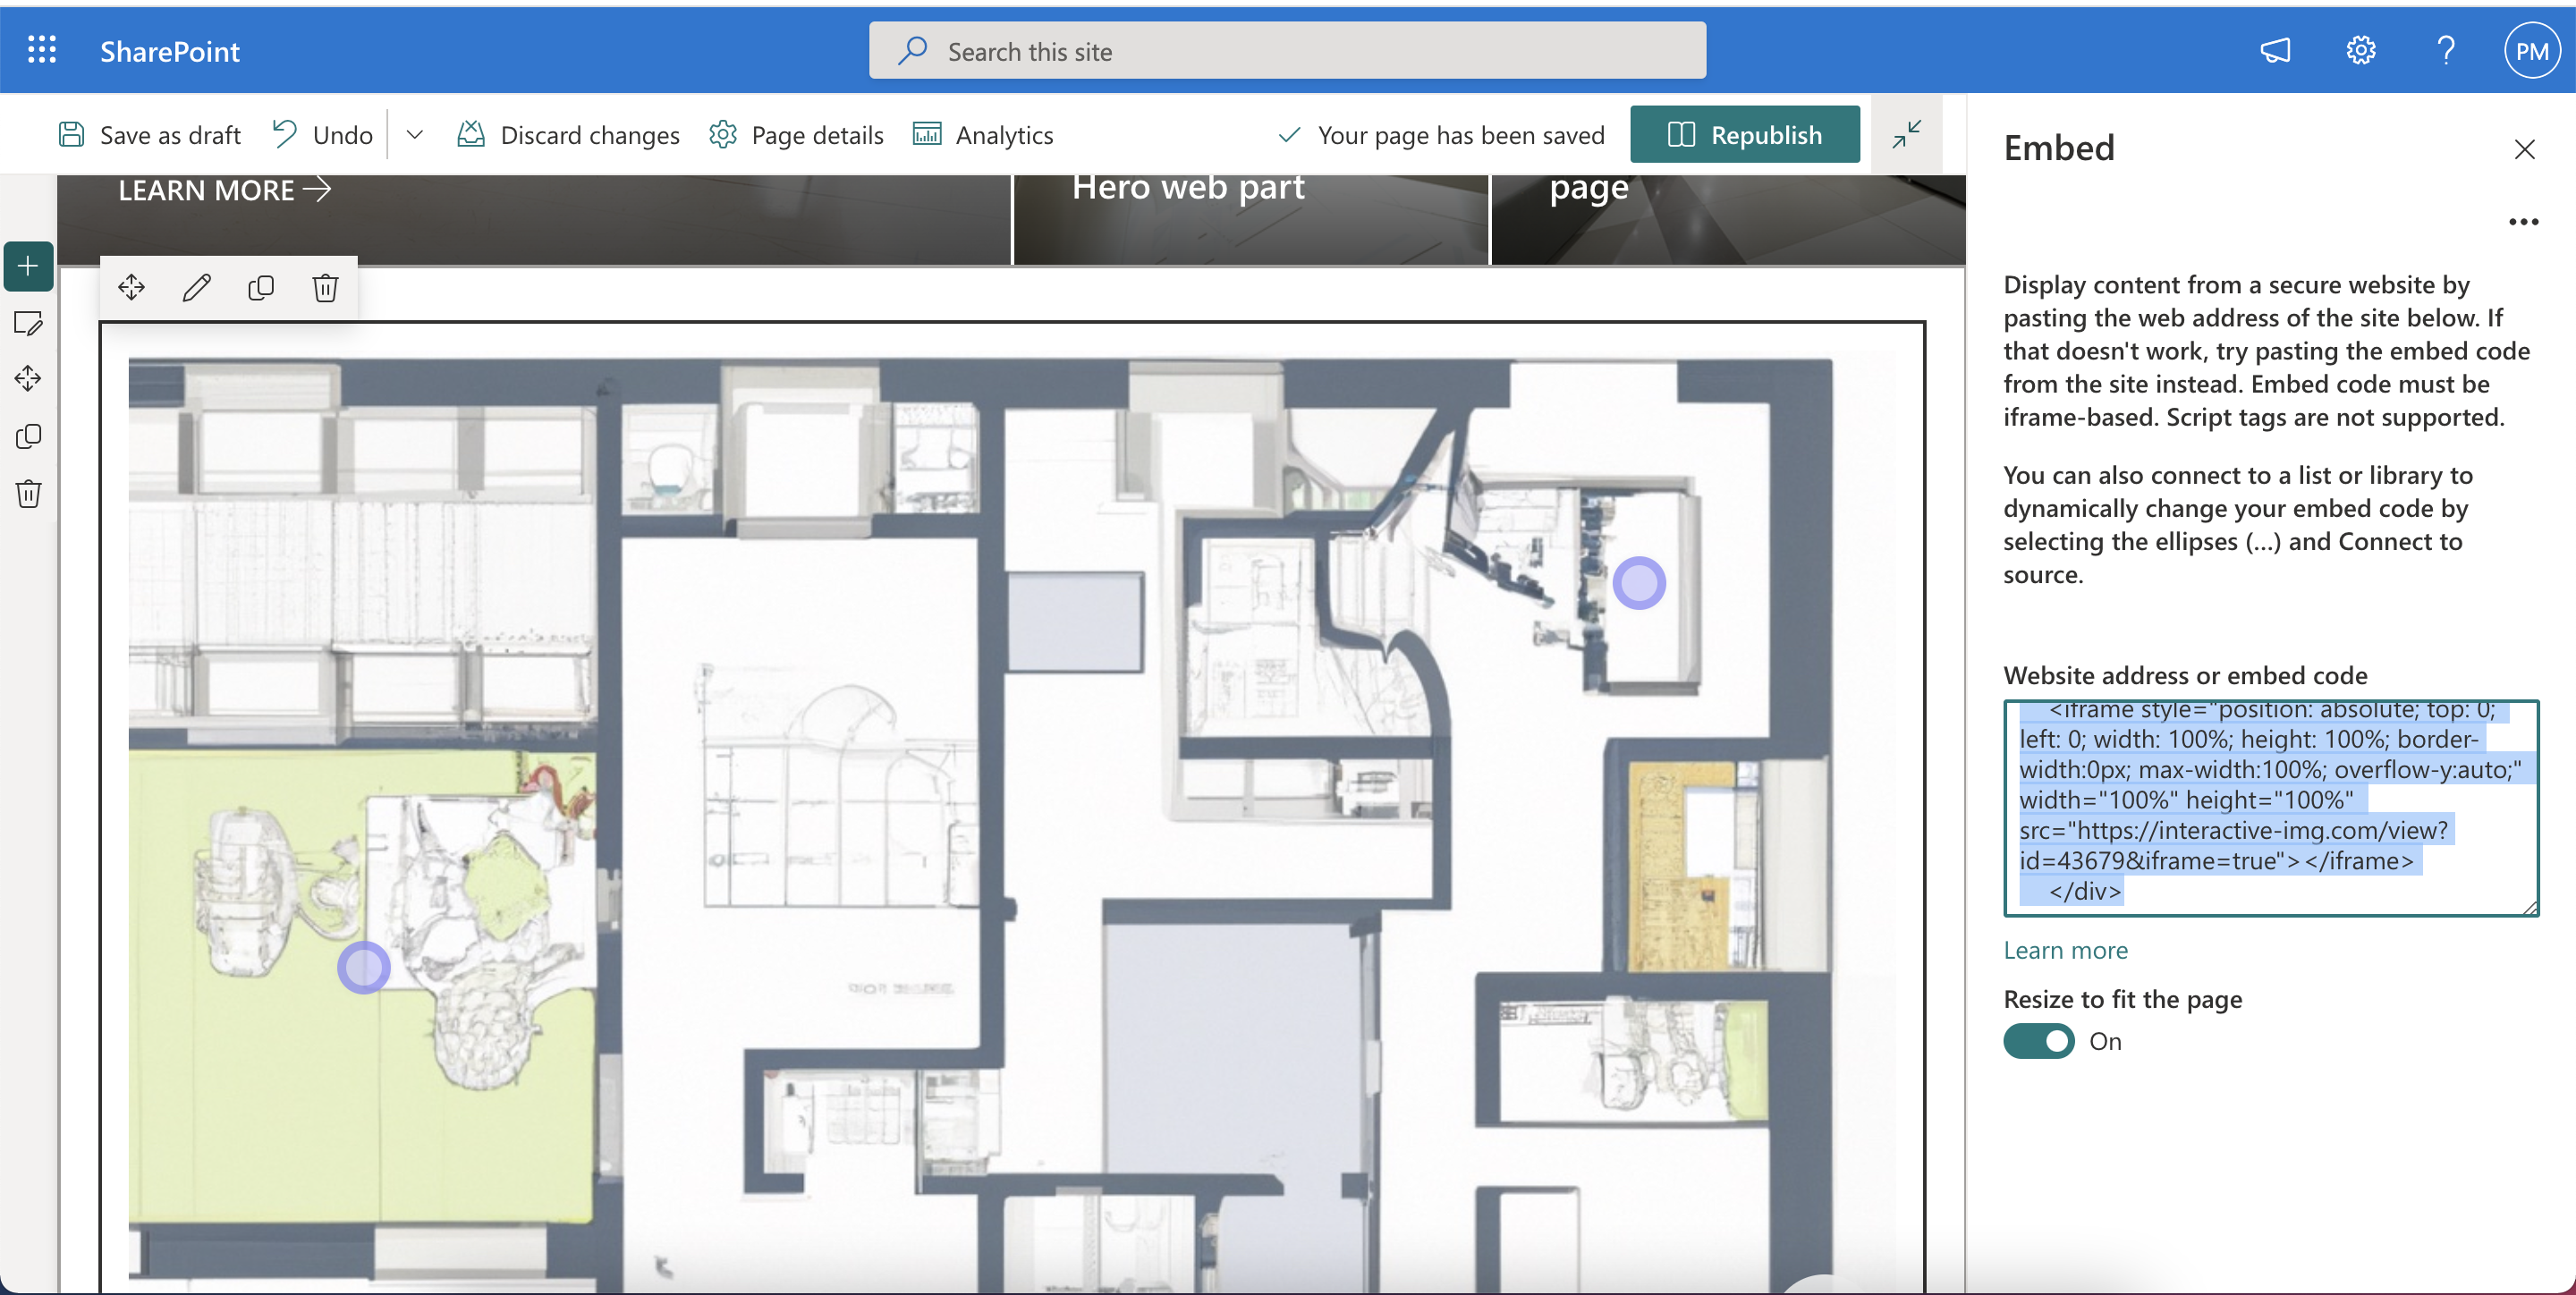
Save the sharepoint page and you are done you have successfully integrated the hotspot image.